Ze Grow Guide

Quelques précisions au sujet du distinguo indica-sativa

/

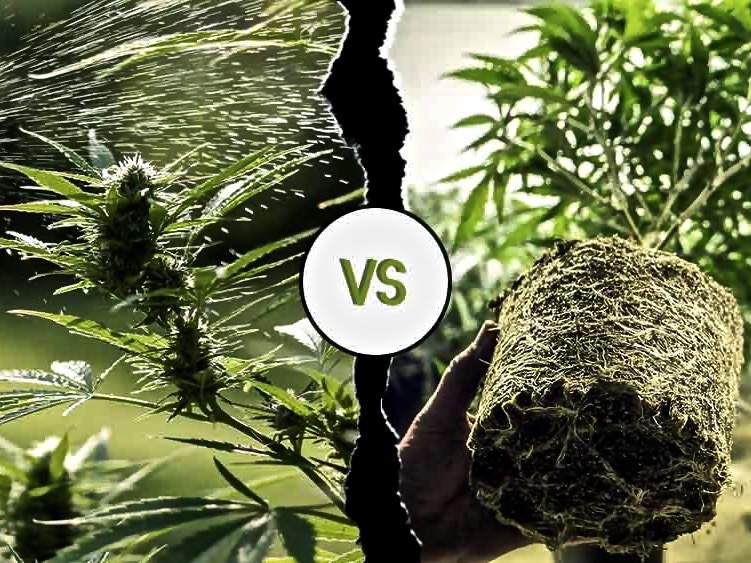
On a tous entendu le fameux  « la sativa est cérébrale, l’indica est physique », et on s’y est fié pendant des années. Problème: cette classification binaire ne serait pas si pertinente que ça, nous apprend notre expert en la matière verte Steven Voser.

Une brève histoire de Ganja

Pour mieux comprendre ce que les termes sativa et indica signifient quant aux effets à attendre de votre weed, il nous faut déjà brièvement se pencher sur l’histoire des études et recherches portant sur cannabis. C’est au botaniste suédois Carl Linnaeus que l’on doit, en 1753, la première classification du cannabis.

Linnaeus travaillait sur des plants importés qu’il faisait pousser en Europe. Sur la souche qu’il aura étudiée, il observera que les plantes sont larges et hautes, arborant des feuilles fines d’une couleur vert foncé. Il remarquera aussi que le cycle depuis la graine à la récolte est d’environ 3 mois. Le botaniste notera enfin que cette variété croît particulièrement bien dans les climats chauds et tropicaux proches de l’équateur. Linnaeus classera cette espèce sous le nom de « Cannabis Sativa L ».

Environ 30 ans plus tard, le biologiste français Jean Baptiste Lamarck se penchera sur d’autres échantillons de cannabis qui lui auront été ramenés d’Inde. Lors de ses observations, Lamarck notera que ses plants affichent des caractéristiques différentes de celles que son confrère Linnaeus avait notées. Le cannabis indien ne dépasse pas 1, 50 mètres, a un aspect beaucoup plus dense et touffu avec de larges feuilles et fleurissaient très rapidement (généralement en moins de 2 mois). Lamarck classera cette espèce sous le nom de « Cannabis Indica Lam »

Dans les années 1920, une troisième espèce de cannabis a été identifiée dans le sud-est de la Russie. Cette variété, maintenant connue sous le nom de Cannabis Ruderalis est beaucoup plus petite que les variétés sativa et indica et fleurit automatiquement en fonction de la maturité plutôt qu’en raison de changements dans son cycle lumineux.

Ce que la classification Indica-Sativa nous enseigne

Carl Linnaeus et Jean Baptiste Lamarck ont ​​utilisé les mots sativa et indica pour décrire deux variétés de cannabis aux caractéristiques particulières.

Aujourd’hui, cette classification reste pertinente, particulièrement lors de l’achat de graines lorsque l’on veut par exemple se lancer dans une petite culture à domicile (voir notre article).
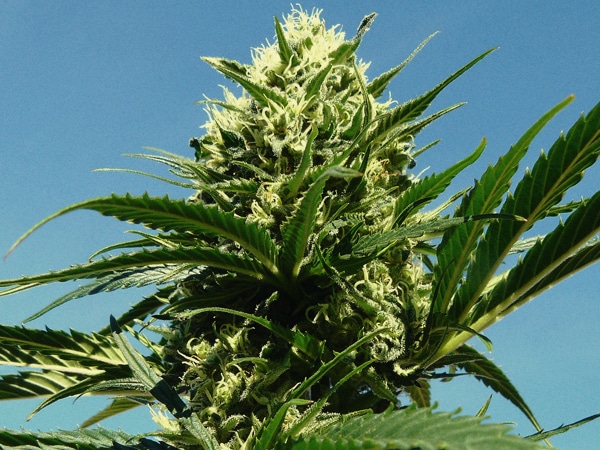
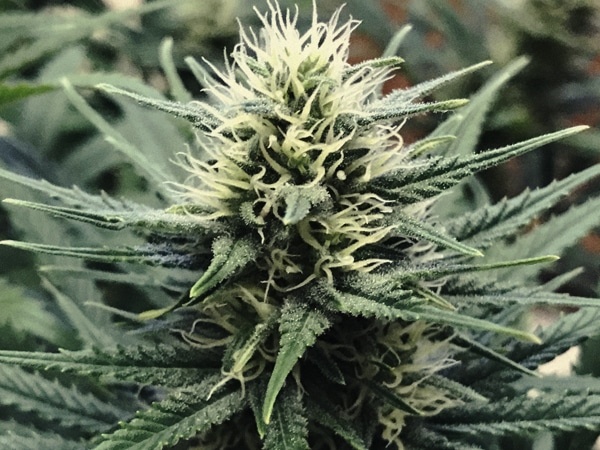
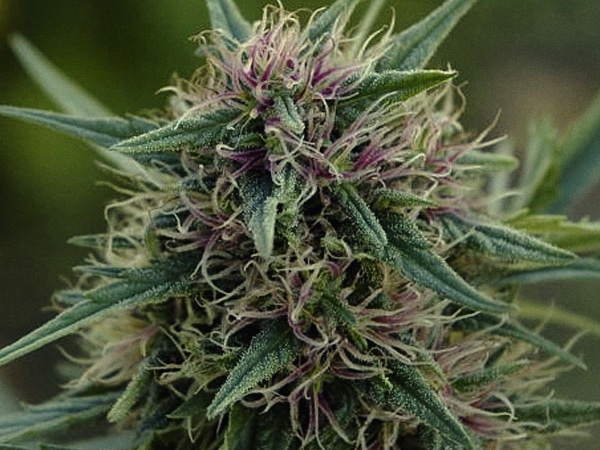
Les durées de croissance et taux d’ensoleillement faisant partie des données à indispensablement prendre en compte.
Et à ce titre, les classifications Indica-Sativa sont des plus pertinentes, avec les caractéristiques suivantes : Les Sativas peuvent atteindre de grandes hauteurs, atteignant facilement plus de 2 mètres et ont tendance à s’étirer vigoureusement lorsqu’elles commencent à fleurir en produisant de gros bourgeons aérés.

Ces plantes sont originaires des régions tropicales chaudes comme le Vietnam, le Mexique, la Colombie et même certaines parties de l’Afrique. Ils ont probablement développé leur structure physique unique pour faire face aux étés longs, chauds et humides dans ces régions et se protéger contre les moisissures et les ravageurs qui prospèrent également dans ces conditions.

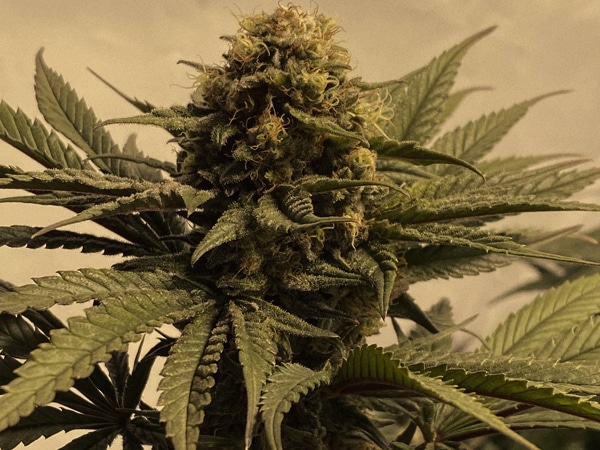
Les indicas, d’autre part, sont originaires des régions montagneuses du Népal, de l’Inde et de l’Afghanistan, où les étés sont naturellement courts et froids. Les plants sont plus petits, avec un espacement internodal (entre deux branches) plus court et arborent de larges feuilles et des fleurs très denses. Les variétés indica produisent également une résine épaisse et peuvent être prêts à être récoltés après seulement 6-8 semaines de floraison. Comme les sativas, ils ont probablement développé ces traits uniques pour faire face aux climats difficiles de leur origine.

Ce que la classification indica/sativa ne vous indique pas

Penchons-nous maintenant sur les effets. Ce qui affecte l’effet d’une variété est bien entendu sa composition chimique, mais aussi la chimie de votre propre corps ainsi que votre tolérance / sensibilité aux produits que vous consommez.

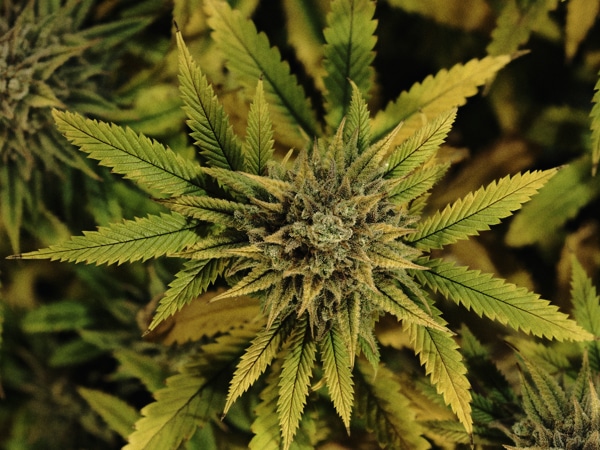
Les souches contenant une grande quantité de mycènes, par exemple, sont plus susceptibles de produire une sensation, un « high » corporel et relaxant, souvent associé aux indicas. Cependant, aucune étude n’a pu démontrer que les souches indica produisaient plus de mycènes que les sativas.
Voilà une donnée qui complique.. la donne. D’autant plus que les terpènes et notes citronnés ou d’ agrumes, typiquement associés aux Sativas et à un effet « cérébrale », sont aussi présents dans certaines variétés d’Indica, qui procurent donc un effet…cérébral.

Lors de l’achat de cannabis, les termes indica et sativa sont précieux et fiables pour vous faire une idée de la lignée génétique et des propriétés physiques d’une variété particulière. Mais pour anticiper ses effets, en revanche, recherchez des rapports de laboratoire qui analysent le profil chimique de cette souche spécifique… Ou sentez tout simplement la ganja en question si vous le pouvez, puisque ce sont les terpènes, ces arômes naturels de la weed, qui définiront la nature de votre voyage cannabique.

Et si vous ne pouvez ni vérifier odeur ou préciser la variété, il ne vous restera plus qu’à acheter à l’aveugle…ou changer de fournisseur.

Steven Mike Voser pour Zeweed

Ze weed Grow Guide: Outdoor VS Indoor

///

When you embark on your weed-growing journey, one of the first decisions you’ll have to make is whether to grow outdoors under the sun or indoors under a light. Both are viable options with their own unique perks and challenges; below we’ll walk you through both setups to help you choose what’s best for you.

An Introduction to Outdoor Cannabis Cultivation

There are many benefits to growing cannabis outdoors. First and foremost, you’ll be working with the best light source there is; the sun. There’s simply no grow light on the market like it, and it’s completely free to use, whereas setting up and running an indoor grow room/tent can quickly become very expensive. 

Most importantly, growing cannabis outdoors is a lot less hands-on than growing it indoors, making it a great place to start for first-time growers. As you’ll see later on this chapter, indoor growing requires you to carefully measure and control variables like temperature, humidity, and airflow, which can be overwhelming for beginners and leaves a lot more room for error.  

However, that’s not to say that outdoor growing comes without its challenges. Outside, your plants are completely exposed to the elements. Strong winds, extended periods of rain, drought, and pests all pose serious risks to your plants and can dramatically impact the amount of weed you harvest and its quality. Growing outdoors also means you’ll be restricted by cannabis’ natural growing season, which runs from Spring through to Autumn (unless you live close to the equator, where you might be able to grow certain strains all year round). 

Here are a few things you’ll need to consider to see if outdoor growing is right for you: 

  • What’s the climate like in your area? Cannabis likes warm daytime temperatures between 20–30°C (or 70–85°F) and cool nighttime temperatures of roughly 15-20°C (or 59-68°F). High humidity and rainfall or extended droughts can lead to pest problems, while strong winds can damage your crops.
  • Do you have a sunny place to keep your plants? Cannabis is a sun-loving plant, and while some people attest to having grown it on windowsills and shady balconies, most growers agree that cannabis plants need at least 6 hours of undisturbed direct sunlight to grow healthily and produce good buds. 
  • Do you have the space for an outdoor garden? Outdoor cannabis plants grow best in large containers (anywhere from 25-50l) and can grow to heights of up to 2m (depending on the strain and amount of space available). In general, we recommend finishing your plants in 25-30l pots and keeping them roughly 1m apart to ensure they stay healthy. Plants grown in a crowded garden have to compete for light and space, causing them to stretch and develop long, flimsy stems and poorly structured buds. Lack of airflow and touching foliage in a crowded garden can also lead to humidity problems and pest issues. 
  • Is it legal to grow cannabis outdoors where you live? If not, consider investing in a more discrete indoor garden. 

What you need to start an outdoor cannabis garden: 

  • Cannabis seeds. We recommend beginners grow no more than 3 plants at a time and avoid planting Sativa-dominant strains, which tend to grow much taller and take much longer to flower. 
  • Pots. For each plant, you’ll want:
      • 1 x starter pot. A 0.5l plastic cup will work perfectly. 
      • 1 x 5l pot for the early vegetative phase
      • 1 x 15l pot for the rest of the vegetative phase. 
      • 1 x finishing pot. 25-30l pots work great for most medium-sized strains. 
  • Soil, fertilizers, and pesticides. Later on in this grow guide, we’ll teach you how to buy or make the perfect cannabis soil, properly use both organic and chemical fertilizers, and how to protect your plants against common cannabis pests.
  • Pruning scissors, gloves, buckets, and other generic gardening equipment. 

An Introduction to Indoor Cannabis Cultivation

Indoor growing is very popular, and for a very good reason; it gives you complete control over the lighting, temperature, humidity, air circulation, and even CO2 levels in your garden, allowing you to create the perfect environment for your plants all year round. 

Many growers find that, with so much control over the environment, they are able to grow healthier plants that produce bigger yields and more potent buds. Pest problems are also far less common indoors, given you keep the conditions in your grow room/tent optimal and clean. 

This level of control, however, also comes at a cost (both literally and figuratively). To grow cannabis indoors, you’ll need: 

  • A grow tent or room to house your plants. Cannabis plants need strict light and dark periods in order to grow healthily and flower properly. Grow tents/rooms help contain the light from your lamps and also help prevent light leaks from outside stressing your plants during their dark periods. 
  • A grow light. Cannabis plants need light to photosynthesize and grow. 
  • Fans. Your plants need a constant supply of fresh air in order to respire. Most growers will use a combination of intake and wall-mounted fans to draw fresh air into their tent/room and keep it circulating around their plants. 

Setting up an indoor grow tent/room isn’t cheap, and learning how to keep it at optimal conditions also isn’t easy. While we love indoor growing, we often recommend beginners grow at least 1 or 2 harvests outdoors before moving their garden indoors.
Here are a few things you’ll need to consider to see if indoor growing is right for you: 

  • Do you have the money to set up and run an indoor tent/room? Below you’ll find a cost sheet to help you get an idea of the price of buying and running basic grow equipment like lights and fans. 
  • Do you have the space for an indoor garden? You’ll need to buy/build a grow tent or transform a cupboard, spare room, or other space inside your home into a grow room to house your plants. For most hobby growers, a 1m2 grow tent/room will provide enough space for 1-3 plants, which will produce more than enough regular weed for even daily smokers. 
  • Do you have the time and will to dedicate to an indoor garden? Growing cannabis indoors requires you to manage all the environmental variables that affect the growth of your plants. While it’s far from rocket science, running an indoor garden is usually more hands-on than tending to plants outdoors. 

Equipment list and cost sheet for an indoor grow room:

Equipment Examples Outright cost (w/out shipping) Total running cost (from seed to harvest)** 
Grow tent AC Infinity Cloudlab 3ft X 3ft (1m2) Grow Tent: This is a budget grow tent that’ll do a fine job at housing 1-4 indoor plants.   $99 USD NA
Gorilla 3ft X 3ft (1m2) Grow Tent: The Gorilla brand is highly revered by growers all around the globe for making some of the best grow tents and equipment on the market.  $292.95 USD NA
Grow light  KINGLED King Plus 600W LED Grow Light: KINGLED is a leading brand in LED grow lights. This 600w light is perfect for small indoor gardens or tents like those mentioned above.  $74.99 USD $113.4 USD 
KINGLED King Plus 1200W LED Grow Light: This light is much higher-powered and suitable for larger grow spaces (up to 3m3).  $135 USD $226.8 USD
Intake fan 15.5W AC Infinity RAXIAL S4 4” Intake Fan: With 106 CFM capacity, this intake fan provides more than enough airflow for the grow tents listed above.  $23.99 USD  $5 USD
Rotular fan  30W Hurricane 12-Inch Wall Mount Fan: Perfect for keeping a gentle breeze blowing through your tent/room.  $44.30 USD $9.7 USD

** The running costs above are calculated based on a standard grow calendar that covers 4 weeks of vegetation (under a 18/6 light schedule) and 8 weeks of flowering (under a 12/12 light cycle) and an electricity cost of $0.15 USD per kilowatt hour.
To calculate the cost of running a piece of grow equipment, first calculate the number of kilowatt hours it will run for using this formula:
Number of hours running X (watts / 1000) = Kilowatt hours
Next, multiply this number by the price of electricity in your area.
EG:If you’re running the 600w KINGLED light listed above for roughly 540 hours during the vegetative phase (18 hours per day for 4 weeks) followed by 720 hours during flower (12 hours per day for 8 weeks), your formula should look like this:
1260 total running hours (veg + flower)  X (600 watts / 1000) = 756 kilowatt hours.
At $0.15 USD per kilowatt hour, the total cost of running your light from veg to flower would be $113.4 USD. 

Note: These are just estimative figures used to give you an idea of what the costs of running your grow room might look like. Costs will vary depending on what equipment you use and the cost of electricity where you live. 

Remember, there’s no right or wrong when it comes to choosing between indoor and outdoor growing. Take your time to consider the pros and cons of each setup and, if you still can’t decide, try an outdoor grow first. You can always invest in an indoor setup later if need be. 


How to properly manage the temperature and humidity in your grow room

Temperature and relative humidity are easily 2 of the most important factors impacting your grow room and the health of your plants. Unfortunately, they are also often overlooked, especially by beginner growers.
In this article, we’ll teach you everything you need to know about the ideal temperature and humidity levels for each stage of a cannabis plant’s life, and help you spot and control temperature/humidity issues before they get out of hand .

Wait, What’s Relative Humidity?

Before we continue, you need to understand relative humidity, a concept that’s crucial to growing great weed but often misunderstood.
Relative humidity is a measurement (displayed as a percentage) of the amount of water vapour present in the air relevant to the temperature. Warm air can hold more moisture than cold air, which is exactly why using relative humidity is so important to growing cannabis; it gives us a more accurate measure of the amount of air present in our grow room.

Image courtesy of Gasparetto Engineering. 

One cubic meter of air at 30°C, for example, can hold roughly 30g of water, while the same amount of air at 10°C can only hold roughly 10g of water. The maximum amount of water air can hold is known as its Dew Point; once we exceed this Dew Point, excess moisture in the air will form as condensation like dew, fog, or rain. The graph above shows the different Dew Points of air at different temperatures.

To measure the humidity in your grow room, invest in a digital thermometer/hygrometer. These inexpensive devices make it easy to track the humidity and temperature inside your grow room and create the perfect environment for your plants.

What’s The Perfect Temperature And Relative Humidity For Growing Cannabis?

Cannabis is a hardy plant that can grow and adapt to various conditions. As we saw in our earlier chapter on the cannabis life cycle, cannabis plants germinate in spring and begin to flower after the summer solstice in response to changes in their photoperiod (except autoflowering strains, which flower based on age).

While individual cultivars might prefer slightly different conditions, most cannabis varieties like warm summers and plenty of sunlight. As they pass through the different stages of their lives, however, cannabis plants favour slightly different conditions; seedlings, for example, love warm, humid conditions, whereas flowering females like things a little drier).

If you’re growing outdoors, you obviously don’t have a lot of control over the temperature and RH in your garden. Indoor growers, on the other hand, can closely monitor and tweak the temperature and RH in their rooms/tents to create the perfect environment for their plants at all stages of their lifecycle.

The table below highlights the perfect growing conditions for cannabis plants in the seedling, vegetative, and flowering phases:

Ideal Temperature Ideal RH Description
Seedling phase Lights on: 20-25°C

Lights off: 20°C

65 -70% Young cannabis seedlings or clones like warm, humid conditions that allow them to take up water via their leaves while they develop their roots.
Veg. phase Lights on: 22-28°C

Lights off: 18-20°C

40-60% Once your plants have developed a solid root system, you can start gradually lowering the humidity and increasing the temperature in your grow room/tent until you reach the ideal conditions described here.

Note: Never change the temperature or humidity in your room/tent drastically as this can shock your plants and stunt their growth, cause pest/pathogen problems, and greatly impact both the size and quality of your yields.

Early and mid-flowering phase (weeks 1-6 approx) Lights on: 20-26 C°

Lights off: 18-20°C

40-50% Flowering cannabis plants like slightly cooler and drier conditions. Female cannabis flowers can trap a lot of moisture, which can lead to bud rot and attract other pests or pathogens into your grow room. This is especially true if you’re growing indica-dominant strains with a dense bud structure. Sativa strains tend to have whispier buds that are better suited to more humid conditions (see our chapter on cannabis genetics for more info).

Again, remember to gradually adjust the conditions in your grow room to avoid stressing your plants.

Late flowering phase (final 3-4 weeks before harvest) Lights on: 20-24°C

Lights off: 15-20°C

30-40% As your plants enter the final stages of their flowering cycle, we recommend further lowering the humidity and temperature in your grow room/tent to avoid bud rot and other humidity issues. Increasing the thermic amplitude (the difference between nighttime and daytime temperatures) can also help promote more trichome production and bring out some vibrant colours in your plants buds, especially in purple strains or Indica-dominant varieties.


How To Create The Perfect Conditions In Your Indoor Grow Room/Tent

  • Know what a particular cultivar likes! Different cannabis strains prefer different conditions. Whenever you’re growing a new variety, try to gather as much information about it as possible (preferably from someone who has grown the same strain or the seedbank that bred it), and also pay close attention to how the plant reacts to different climatic conditions.
  • Buy a thermometer/hygrometer. Don’t even try to play around with the temperature/RH in your tent/room until you’ve bought a thermometer/hygrometer.
  • Know what to look for. While plant’s obviously can’t talk, they are very good at communicating when something isn’t right. Study the list of warning signs of temperature/humidity issues below in order to catch these problems early and adapt accordingly.
  • Use a humidifier/dehumidifier to adapt the relative humidity in your grow room/tent.
  • Use intake, outtake, and oscillating fans (and heating/cooling, if necessary) to keep temperatures optimal.

Signs of Plants Stressed By Temperature/Humidity Issues

Signs of heat stress

  • Rapidly drying soil.
  • Leaves cupping and pointing upwards.
  • Visibly burnt or dried out leaves or buds.
  • Flowering plants exposed to hot conditions grow airy, thin buds and sometimes start developing new, whispy flowers on top of older ones.

How to drive down the temperature in your grow room/tent:

  • Increase air circulation and use intake and outtake fans to keep hot air flowing out of your tent/room and fresh, cool air flowing in.
  • Switch to LED lights that produce less heat.
  • Move your grow lights further away from the top of your plants.

Signs of cold stress

  • Stunted growth. Cold weather affects many of cannabis’ metabolic processes, making it harder for the plant to take up nutrients and water to fuel its growth.
  • Nutrient deficiencies. As temperatures drop below optimum levels, cannabis plants struggle to take up certain nutrients and may develop signs of a nutrient deficiency.
  • Soil that stays moist for extended periods of time.
  • Wilting.

How to increase the temperature in your grow room/tent:

  • Move your plants into a warmer area of the house.
  • Switch from LED lights to a grow light that emits more heat.
  • Turn off or slow down your intake and outtake fans.

Signs of high humidity

  • Soil that never completely dries out.
  • Limp, weak plants.
  • Stunted growth. Just like with low temperatures and low humidity, high humidity also affects the metabolism of plants and their ability to take up water and nutrients.
  • Bud rot, botrytis, or other fungal pathogens thrive in humid conditions, attacking your plants’ buds, foliage, and roots and causing them to rot.

How to decrease humidity in your grow room/tent:

  • Increase air circulation using outtake, intake, and oscillating fans.
  • Water your plants less frequently.
  • Use a dehumidifier.

Signs of low humidity

  • Soil that dries up extremely fast. Plants exposed to dry conditions drink a lot more water.
  • As a side effect of drinking more water, plants might also take up more nutrients from their soil and fertilizer and develop nutrient burn.
  • Stunted growth and weak, feeble plants.

How to increase humidity in the grow room

  • Use a humidifier.
  • Mist the air in your grow space (do not do this during the flowering phase).

While many people think cannabis grows like a weed, there are many ways we can help our plants grow even faster and produce bigger, better harvests. And maintaining the right temperature and relative humidity is one of the first and most important ways of doing exactly that.

Top 5 Cannabis Strains To Grow at Home

//

When it comes to selecting which cannabis seeds to grow, things can get tricky! With so much choice, many growers are left indecisive. If you’re finding it hard to choose, check out our list of the top 5 varieties to grow at home below! Here you’ll find legendary genetics, including Northern Light Automatic and Green Gelato. Expect nothing but high potency, great flavours, and superb yields!

Northern Light Automatic

This fast-growing strain combines the powerful genetics of Northern Light with the rapid growth of Cannabis ruderalis. After placing seeds in the soil, prepare to harvest her beautiful green-blue flowers within 10–12 weeks.
THC level of Northern Light Automatic it’s 14%, and offers a mellow physical high perfect for lazy afternoons and evenings. Enjoy her delicious terpenes that provide tastes of citrus, earth, fruits, pepper, and pine. Her medium height of 80–120cm indoors makes her ideal for stealthy growing operations.

The classic Northern Light… in a couple of month.

Get it here

Cookies Gelato

As her name suggests, Cookies Gelato offers mouth-watering terpenes. She inherited her insane taste from equally delicious parent strains Girl Scout Cookies and Gelato 33. Enjoy her flavours of earth, fruit, and mint, but try not to get carried away.
Her massive THC content of 28% hits like a truck and sends the mind to the moon. Prepare yourself for a long-lasting high that inspires the mind while plunging the body into a deeply relaxed state.

Meet Gelato 33 & Girl Scout Cookies’s offspring: the amazing Cookies Gelato

Green Gelato

Green Gelato pairs an intense high with a seemingly unreal terpene profile. After loading a bong or blunt, you’ll experience waves of vanilla, mint, and citrus roll over your tongue. Shortly after, a THC level of 27% will light up your cannabinoid receptors and induce a well-rounded high.
Colours become brighter and music sounds more pleasant as the stimulating effects take hold of your mind. Light up these flowers during the day to stay productive, engaged, and creative. Just take things one toke at a time to avoid overdoing things!

Green Gelato: A classic of America’s finest weed

Get the Green Gelato here

White Widow Automatic

This quick and easy auto flowering strain descends from cannabis royalty. Known all over the weed world for decades, the original White Widow stems from Brazilian and Indian landrace genetics.
After crossing her with Cannabis ruderalis, breeders created a faster variety that produces more mellow effects. Indoor plants grow to 40–80cm and are perfect for clandestine setups. Grow this earthy strain within converted computer towers or buckets for maximum stealth. After hitting these buds, expect a balanced body–mind high that pulls the self into the present moment.

White Widow automatic: a perfect strain harvested in a couple of month

Purple Queen Automatic

Are you ready to get euphoric? Not only does Purple Queen Automatic produce stunning purple buds, but she elevates the mind to a place of peace and pleasure. Her indica-dominant genetic profile and THC level of 16% converge to create a relaxing and enjoyable high perfect for days spent out in nature.
Blaze these buds in the forest or at the beach to really tap into your surroundings and feel grateful to simply be alive. Delicious flavours of citrus and large yields of 350–400g/m² are huge bonuses when growing this cultivar.

Kick back, relax and enjoy Purple Queen’s magic in 9 to 10 weeks from seed to harvest.

Cannabis Genetics: Understanding What They Mean And What They Tell Us About The Plants We Grow

//

In our previous chapter, we walked you through the cannabis life cycle in order to help you better understand how cannabis plants grow in nature and avoid surprises when you’re growing them yourself in a tent, room, or outdoor garden. In this chapter, we’ll take an in-depth look at cannabis genetics. When you shop for seeds, you’ll encounter a bunch of jargon that can be hard to understand and makes it difficult to find a strain suited to your personal setup and skills as a grower. 

With the info in this chapter, however, you’ll learn to understand some of the basics of cannabis genetics and what terms like indica, sativa, and ruderalis tell us about a strain and the way it’s likely to grow. 

Indica, Sativa, And Ruderalis: Understanding The Core Of Cannabis Genetics

When you shop for cannabis seeds, you’ll constantly run into the terms sativa and indica. However, there’s a lot of misconception among growers and even breeders about what these terms actually mean. 

One huge misconception that’s still held even by experienced cannabis professionals is that the terms indica and sativa tell us about the psychoactive effects of a particular plant. There’s still a strong consensus among the cannabis community, for example, that indica strains are relaxing and sedating, whereas sativas are uplifting and euphoric.
The reality, however, is a bit more complicated. 

The terms indica and sativa actually describe 2 different species or subspecies of cannabis, each with distinct physical traits and growth patterns. 

Cannabis sativa, for example, was first described by Swedish botanist Carl Linnaeus in Species Plantarum in 1753 . Linnaeus was working with European cannabis plants most likely being grown for industrial and medicinal purposes. These plants had bright green foliage, narrow-fingered leaves, and took up to 3 months to flower. He classified them as Cannabis sativa L. 

Roughly 30 years later, French botanist Jean Baptiste Lamarck was studying cannabis specimens collected in India. These plants, however, were very different to those Linnaeus described in his book; so different, in fact, that Lamarck invoked a second species of Cannabis, namely Cannabis indica Lam. These plants were shorter and bushier, with dark-green foliage, wide-fingered leaves, and a faster flowering time of under 2 months. They also produced denser, more resinous flowers than the cannabis plants first described by Linnaeus, and originated from colder, mountainous regions.

In the 1920s, Russian botanist D. E. Janischewsky discovered and described Cannabis ruderalis, a third cannabis variety native to Central Europe and Russia. These plants are small (rarely growing over 60cm tall), have thin stems, and produce few branches, with some sources describing their growth as much more “weed-like.”

Unlike Cannabis sativa and Cannabis indica, which are both photoperiodic and flower based on changes in their light cycle, Cannabis ruderalis plants flower “automatically” once they are about 5-7 weeks old. 

Deciphering The Cannabis Gene Pool And Finding The Right Strain

Today, most of the cannabis strains on the market are what growers regularly refer to as “hybrids,” meaning they have both indica and sativa genetics. That’s because cannabis has been meticulously cross-bred over the last 50 years, as breeders try to create strains with unique aromas, higher potencies, and growth traits better suited to indoor growing (given the plant’s complicated legal status). 

Automatic or “autoflowering” cannabis strains have also grown in popularity in recent years. These strains contain a mix of sativa, indica, and ruderalis genetics, giving them the advantage of flowering based on age rather than in response to changes in their photoperiod. 

When you’re shopping for cannabis seeds, remember that the terms indica, sativa, and ruderalis don’t really tell you anything about the effects of particular strain. What governs a plant’s effect on the human body is its chemical composition, the body chemistry of the person consuming it, and the route of administration they choose (be it smoking, vaporization, or ingestion). You can read more about this in our earlier blog posts on Indica Vs. Sativa. 

What the terms indica, sativa, and ruderalis CAN tell you about a strain, however, is the way it is likely to grow. For example: 
  • Indica-dominant cannabis strains tend to grow shorter and bushier than sativas. They also tend to flower quicker and produce dense, resinous buds. They likely developed these traits as they adapted to growing in the colder, windier conditions and shorter summers of the regions they originate from. Indica-dominant strains are ideal for indoor growers working with small spaces or outdoor growers living in colder, windier regions with a short growing season. While indica strains produce beautiful dense and resinous buds, their small stature means they typically produce smaller yields than sativa-dominant varieties. Their bushy stature and tight bud structure also makes them more sensitive to humidity and more prone to fungal or pest problems when growing in warm, humid climates.
     
  • Sativa-dominant cannabis strains can grow very tall and leggy. They are particularly renowned for “stretching” once they start to flower and produce larger, airier buds. Sativa-dominant cannabis strains also have longer flowering cycles, with some varieties taking up to 12 weeks or more to properly complete their bloom phase. They likely developed these traits as they adapted to the warm, humid conditions and long summers of the regions they come from. We recommend these strains for outdoor growers with a lot of space and growing experience who live in areas with warm, long summers and are looking for big harvests. While large sativa strains can produce huge yields, their main setbacks are their size and long flowering cycles, which can be hard for inexperienced growers to manage.
  • Automatic or autoflowering cannabis strains contain a mix of sativa, indica, and ruderalis genetics. These tend to be smaller plants, growing to average heights of around 60-100cm, and therefore also produce smaller yields. However, their short stature and ultra-fast flowering time (some autos go from seed to harvest in as little as 8 weeks) make them perfect candidates for hobby growers working with small spaces and only looking to grow enough weed for their own personal use. While some growers claim that autoflowering strains are less potent than their photoperiod cousins, we’ve never had any potency issues with the autos we’ve grown. 

Remember, the cannabis genetics on the market today are, for the most part, still very unstable. That’s because cannabis hasn’t yet undergone the same breeding procedures as other crops (such as corn or potatoes). 

Most of the cannabis strains on the market today are what geneticists would call F1 (or first filial generation) hybrids. Without getting too technical, a F1 hybrid is basically what you get if you take the pollen from one male cannabis plant and use it to pollinate a female. What you’ll end up with are hundreds of seeds containing genetic traits from both parents. 

Sow those seeds and you’ll now be left with hundreds of plants that’ll likely look very different from each other. That’s because, despite carrying the same genetic blueprint, these plants may express the genetic traits they’ve inherited from their parents in different ways (just like you and your siblings might look very different from one another despite having the same parents). 

Cannabis breeders can use techniques such as inbreeding to help stabilize their strains, but the genetics on the market are still far from being as reliably stable as those of other crops. If you’re looking for reliable cannabis seeds, we recommend buying from renowned seed banks such as Sensi Seeds, Royal Queen Seeds, Silver River Seeds, and Dutch Passion. Also consider keeping a mother plant (explained in more detail later on in this book) and growing clones if you want to preserve a particular strain.  


Shortage guerilla: building a grow tent from scratch.

////

The global lockdown and quarantine caused by the COVID-19 pandemic are leaving cannabis connoisseurs with little-to-nothing to toke on (except those lucky enough to live in legal states in the US or Canada).  If you’re struggling to get hooked up during COVID-19, you’re in luck; in our upcoming posts, we’ll share some of our top tips for growing great weed at home. To get started, here’s how to set up a simple grow tent using just PVC and plastic film. 

Building A Budget Grow Tent With PVC And Poly Film

What You’ll Need

  • ¾” PVC pipes in the following sizes: 
    • 4 2m-long pieces 
    • 4 1m-long pieces
    • 12 40cm-long pieces
  • ¾” PVC fittings: 
    • 8 90° degree 3-way corner fittings
    • 4 T fittings
    • 1 cross fitting
  • 3 sheets of black and white poly film (sometimes sold as Panda film) in the following sizes: 
    • 3.5m X 2.5m 
    • 2.5m X 1.5m 
    • 1.5m X 1.5m
  • Duct tape
  • 6 velcro strips

Note: These materials are enough to build a 1m X 1m X 2m grow tent, which is perfect for most small hobby growers who just want to grow a few plants. If you want to build a bigger tent, you’ll just need longer PVC pipes and more poly film.

Method

Creating the frame. 

With your PVC pipes cut into size, assembling the frame of your tent is a piece of cake. Just follow these simple instructions:

  1. Use 4 1m PVC pipes and 4 3-way cross fittings to create the square base of your tent. 
  2. Connect 4 2m PVC pipes to the corner joints of your base to create the vertical supports for the walls of your tent. 
  3. Use the remaining pieces of PVC pipe, T fittings, and cross fitting to create the roof of your tent. This should look similar to the base, just with 4 pieces of PVC running to the center of the roof to form a cross. This will provide extra support for your grow light.

Putting up the walls

To create the walls of this budget tent, we’ll just be using black and white poly film because it’s cheap, fairly durable (as long as you don’t take to it with a knife), and takes care of light leaks. 

Plus, the white side of the film is perfect for the inside walls of the tent as it will reflect plenty of light back onto your plants, while the black side of the film is perfect for absorbing light on the exterior. 

To wrap your tent, just follow these simple instructions: 

  1. Use the 3.5m X 2.5m piece of film to cover 3 of the 4 walls of your frame (the 4th will serve as the door of your tent). To do this, it might help to lay the film out flat on the floor and lay your tent on top of it. Then simply wrap the edges over the walls, cut off any excess, and secure the edges of the film to the PVC frame using duct tape. Remember, you’ll want your walls to be wrapped tightly around the frame and run all the way to the floor to keep out as much light as possible. 
  2. Next, cover the roof of your tent using the 1.5mX1.5m piece of film and trim off any excess. Remember to leave about 2-3cm of overlap on each wall, then secure everything down with duct tape. 
  3. Now it’s time to create the door for your tent. To do this, use your last piece of poly film and run it from the floor up to the middle of the roof. Cut off any excess and secure it down with duct tape. 
  4. Finally, use 3 velcro strips along the inside of the PVC frame and door flap to keep your door secured when you don’t need access to your plants. 

Tip: Once you’ve finished setting up your tent, stand inside it, and look for light leaks. Should you spot any small leaks, cover them with duct tape on the outside of your tent. 

Deck Out Your Tent With The Right Gear

Once you’ve built your tent, all that’s left to do is deck it out with the right grow equipment. Here’s a list of everything you’ll need to start growing your first batch of homegrown kush: 

  • A grow light. There are tons of grow lights on the market, but for beginner growers looking to grow just a few plants during COVID-19, this Omega kit is perfect. It comes with a programmable ballast, a 600w dual spectrum light for vegging and blooming, a reflector hood, and cable ties for easy installation. Remember to use a timer to manage your light/dark periods correctly.
  • A fan. Ventilation is really important when growing weed. Without moving fresh air in and around your grow room, you might run into heat or humidity issues that can fry your plants or create a breeding ground for pests and plagues. For the best results, invest in a small wall-mounted fan and an inline fan-filter combo like this one by iPower.
  • A thermometer/hygrometer. This Neoteck thermometer/hygrometer is perfect for measuring the temperature and humidity in your tent. 
  • Soil, nutrients, pots, and seeds. 

That’s it! Now that you have everything to start your grow, it’s time to get your hands dirty and germinate your seeds. 

Happy growing!

Shortage Guerilla: Growing Organic Weed.

////

Cannabis is strongly aligned with the green movement. Unfortunately, most of the weed we find in dispensaries, coffeeshops, or on the street is far from “green.” Just like other crops, cannabis is usually grown with chemical fertilizers, pesticides, herbicides, bloom boosters, and more. Here’s our guide to grow a sweet healthy ganja (and survive the shortage).

If you’re worried about the impact your love for weed is having on the environment or your health, you’re in luck.
In this article, I’ll share my tips for growing your own organic weed at home using natural soil amendments, compost teas, organic pest control, and more. 

Creating Your Own Super Soil

Healthy soil is the key to healthy plants and great harvests. 

In nature, plants get all their nutrients from topsoil, which is made up of decomposed organic matter and millions of beneficial microorganisms. When growing organically at home, your focus should be on creating that same kind of rich soil using natural ingredients, rather than pumping your plants full of chemicals. 

Below I’ll share a simple recipe for creating your own organic super soil that’ll give your plants everything they need to develop great foliage and delicious buds:

1 Start with 3 parts organic starter soil. I recommend using ProMix HP because it’s been used by countless cannabis growers for years and contains mycorrhizae, a type of fungi that helps your plants absorb more nutrients. ProMix Potting Mix also works well, as will any other organic potting mix you can find at your local gardening store. 

2 Next, you’ll want to enrich your soil with the following ingredients: 

  • 1 part perlite.
  • ½ part vermiculite for water retention.
  • 1 part worm castings.
  • 65g dolomite lime. This is a natural fertilizer rich in calcium and magnesium and helps regulate soil pH.
  • 65g fishbone meal, which is rich in phosphorus and calcium to boost your plants’ vegetative growth. 
  • 45g organic guano, a plant superfood derived from bat feces that’s rich in macro and micronutrients. 
  • 30g Epsom salts to help boost nutrient uptake and chlorophyll production in your vegging plants. 

Note 1: Dampen your soil and let it sit for 1-2 days to activate it before planting. 

Note 2: Never plant seeds or seedlings directly in this soil. Instead, let your seedlings mature in a light soil made of 50% peat moss and 50% vermiculite for about 2 weeks before transplanting them to your super soil. 

Feeding Cannabis Plants With Organic Compost Tea

The super soil we described above will provide your plants with a steady flow of nutrients throughout their entire life cycle. However, you can use compost teas to keep your soil life healthy and boost the growth of your plants even further.

There are countless compost tea recipes on the internet. For beginners, however, I recommend following this basic recipe:

  • 20l of water (if you’re using tap water, let it sit for 24 hours to help evaporate chlorine)
  • 250g compost
  • 1 tablespoon molasses
  • 1 tablespoon liquid kelp
  • 1 teaspoon fish hydrolysate 

To brew your tea, you’ll need a 20l bucket and an air pump or airstone to oxygenate the water, which further helps evaporate chlorine and supports the life of the microorganisms as your tea brews.

Let your pump aerate the water for 2-3 hours, then combine your ingredients in a nylon sock or mesh bag and let them brew for 24 hours. Don’t brew your tea any longer than this or you’ll create a breeding ground for bad bacteria like salmonella and E.coli. 

When feeding your plants, use 1 cup (120ml) of tea for every liter of water. Remember to use your tea within an hour after brewing, as it will lose activity over time. I recommend feeding plants with compost tea 2-3 times a week. 

Fighting Pests And Disease Organically

Growing organically doesn’t mean you’ll be defenseless against pests or diseases. Some of the best natural pest/disease control measures to protect your cannabis plants include: 

  • Compost tea. That’s right, the same tea you use to feed your plants is also great at staving off predators and diseases. For best results, dilute 1 part tea in 2 parts water and douse your plants liberally. You’ll need multiple applications to treat infected/sick plants. 


  • Beneficial insects. Spiders, predator mites, ladybugs, and lacewings are great for pest control. Check your local garden superstore for mites and friendly insects.  


  • Neem oil. Neem oil is a natural pesticide and fungicide that deserves a spot in every garden. 


Remember, growing organically is all about recreating a naturally vibrant soil. And while it might seem overwhelming at first, follow the instructions above and you’ll be harvesting your own, home-grown organic weed in no time.